Shed to Home Office Transformation: Smart DIY Planning
Working from home sounds simple until your kitchen table starts feeling like a bad long-term lease. A shed home office transformation gives you a separate place to focus, but the project only works if you plan the boring parts first. That means structure, power, light, insulation, and access. Skip those, and you get a box that looks finished but feels miserable in July and January.
The good news is that a shed can become a solid office without turning into a full house addition. You do need a clear plan. How much space do you really need? Will you run a computer, monitor, space heater, and printer at the same time? Those choices drive the build, not the paint color. Treat it like building a small studio, not decorating a storage unit.
What matters most in a shed home office transformation
- Start with structure. Check the floor, roof, framing, and siding before you touch finishes.
- Plan power early. Office gear needs safe circuits, outlets, and lighting.
- Control temperature. Insulation and ventilation matter more than fancy furniture.
- Use the floor plan wisely. A desk, chair, storage, and a clear walking path are enough for most setups.
- Think about code and permits. Local rules can affect electrical work, windows, and occupancy.
Why the shell comes first in a shed home office transformation
Look at the shed like a car before a road trip. You would not pack luggage before checking the tires. Same idea here. If the roof leaks or the floor sags, every finish you add just hides a future problem.
Walk the structure and look for soft wood, water staining, insect damage, and gaps around doors or windows. If the shell is sound, you can move to the inside with confidence. If it is not, fix the bones first. That order saves money and frustration.
Best rule: build comfort from the outside in. A nice desk will not make a drafty, damp shed usable.
How to plan power, light, and internet
Office life depends on steady electricity. A laptop alone is easy. Add a monitor, charging station, desk lamp, printer, and climate control, and the load climbs fast. Have an electrician review the setup if you are adding new circuits or running power to the shed.
Lighting matters too. Natural light helps, but glare on a screen can wreck your day. Put the desk near a window if possible, then use layered light: ceiling light for general brightness, task light for the desk, and maybe a small lamp for evening work. For internet, wired service or a strong mesh node often beats a weak Wi-Fi signal from the house.
Shed home office transformation: insulation, heat, and cooling
This is the part that separates a pretty shed from a room you can use all year. Insulation slows heat loss in winter and heat gain in summer. Add it to the walls, ceiling, and often the floor, then seal air gaps around doors, windows, and joints.
What should you use? That depends on the shed and your climate, but rigid foam, fiberglass batts, and spray foam each have a place. Ventilation also matters, especially in warm months. A mini-split system is a popular option for many small offices because it handles both heating and cooling with good control (and less noise than a window unit).
A practical order for climate control
- Seal leaks and gaps.
- Insulate walls, ceiling, and floor.
- Add vapor control if your climate calls for it.
- Install heating and cooling.
- Test the room on a hot day and a cold one.
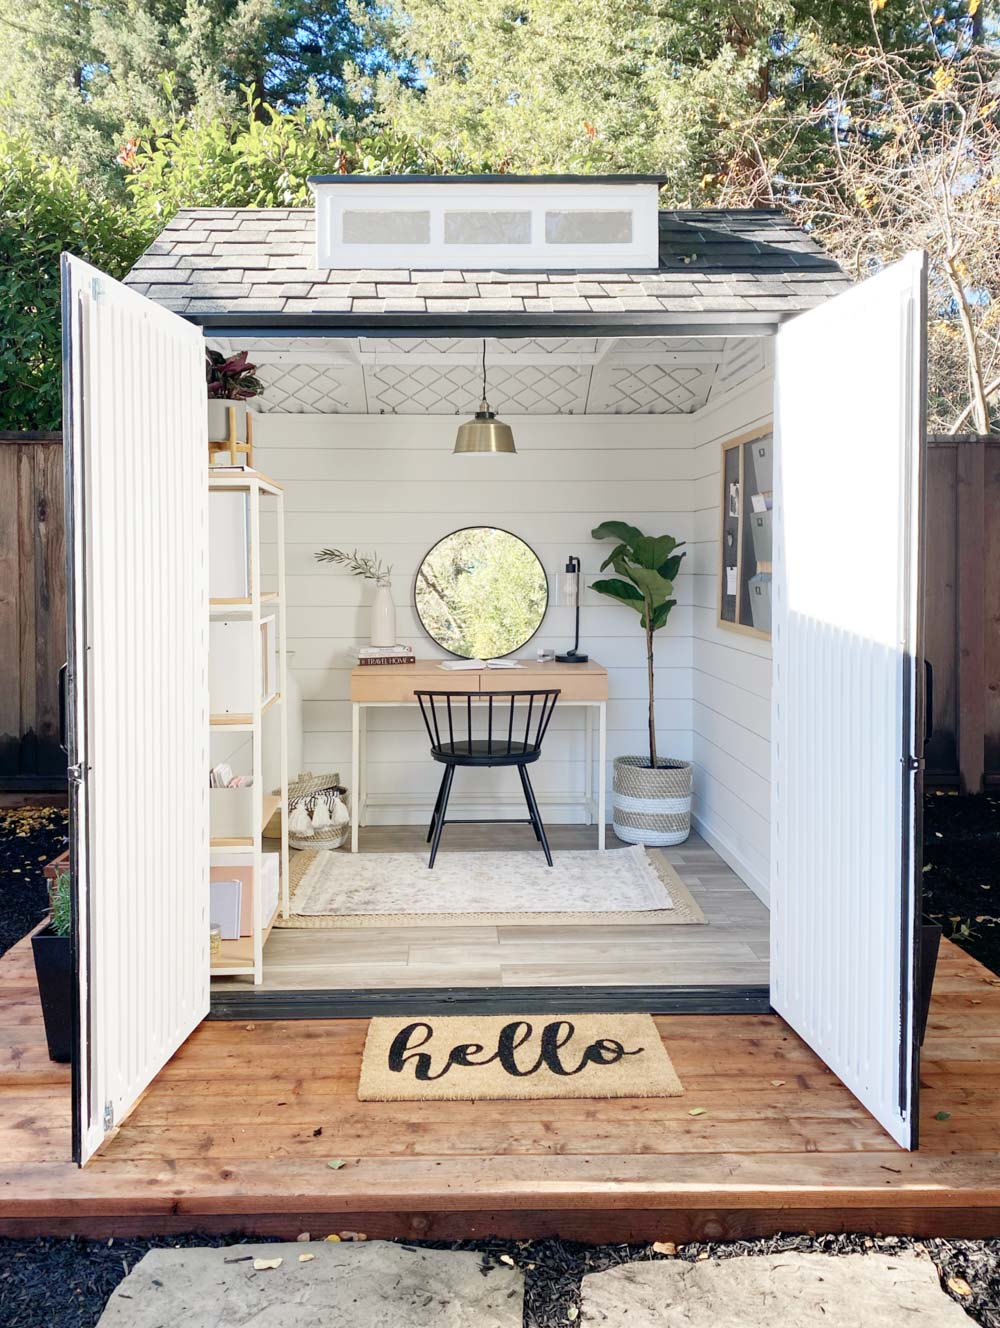
How to design the layout so it actually works
A shed office is small, so every inch counts. Put the desk where you get useful daylight without screen glare. Keep storage off the main path. Use wall shelves, a shallow cabinet, or a pegboard so the floor stays open. That makes the room feel larger and easier to clean.
And do not over-furnish it. One chair, one desk, one storage zone. That is usually enough. If you try to squeeze in a sofa, a second desk, and a filing cabinet the size of a fridge, the room stops feeling calm. Why build a separate office if it ends up feeling tighter than the room you escaped?
Materials and finishes that make maintenance easier
Choose surfaces that wipe down fast and hold up to daily use. Painted drywall gives a clean, finished look. Plywood can work if you want a tougher, more workshop-like feel. For flooring, look for something durable and easy to clean, such as vinyl plank or sealed wood, depending on the base structure.
Keep the palette simple. Light wall colors help a small room feel open. Use one accent color if you want personality, but avoid busy patterns that make the space feel cramped. This is an office, not a guest room stage set.
What to budget for before you start
Costs vary a lot based on the shed size, the condition of the structure, and how much work you do yourself. Electrical upgrades, insulation, windows, and climate control often take the biggest bite. A fresh coat of paint is cheap. A safe, comfortable workroom is not. That is the honest split.
Get quotes for the parts you cannot safely DIY. Then price the materials you can handle yourself. That gives you a real number, not a wishful one. It also helps you decide whether to upgrade the existing shed or start with a better shell.
Smart money move: spend first on the things that affect comfort and safety. Finishes come after the room works.
What makes the project worth it?
A shed home office transformation gives you separation, fewer distractions, and a space that belongs to your work. That matters more than fancy trim or a trendy chair. The best setups feel simple because they are built on solid decisions.
Start with the shell. Fix power and climate. Then shape the room around how you actually work. That is how you turn a backyard shed into a place you will use every day, not just admire from the window.
Now the real question is simple. Are you building a place to store a desk, or a room that helps you think better?